If you own a condominium in California and are considering installing an EV charger at your private parking spot, you’re in luck. California’s “Right to Charge” law ensures that condominium owners are legally allowed to install their own EV chargers, which was news to me when I moved to this state. Here’s how I successfully installed one in my private parking spot in San José, CA, along with some tips to help you navigate the process.
Why Install a Home Charger?
While workplace chargers are an option, they’re often in high demand, and you may not always have access. While I am able to charge at my workplace for free, if I don’t arrive before 9am then I must join a waitlist to charge, which may prevent me from being able to charge for enough hours. And, when a spot does become available, I’ve spent a fair amount of time trying to find that specific charger, only to frustratingly find that someone has incorrectly parked in my spot.
Tesla superchargers are quite reliable but you may need to wait a long time for one to become available, and the electricity costs are usually higher than residential rates.
Home charging offers the convenience of charging overnight at residential rates, avoiding the hassle and higher costs of public chargers. A personal charger greatly enhances the experience of owning an EV and can make it even more convenient than filling up a gas-powered vehicle at the pump.
How much will it cost?
Please note that the cost can greatly vary depending on your county and how complex your installation is. Condominium charger installation will generally cost way more than a home charger, because you will likely need to install a subpanel in your electrical room, and the wiring will be more complicated than in a single family home. But here’s what I paid so you get an idea of the cost:
- $439: Chargepoint Homeflex charger
- $308: San Jose permit fees
- $6000: Electrician service fee
Total cost of installation in February 2025: $6747
Be prepared for potential cost increases throughout the installation. My initial quote for the electrician service fee was under $5,000 (which I thought would include permit fees as well), but the final cost of his service rose to $6,000 due to unanticipated wiring needs. The distance between your parking spot and the electric meter can significantly impact costs—thicker wires are required for longer distances, increasing expenses.
He asked me not to share the installation price, especially because different installations will have varying costs due to different requirements, but I think it’s helpful to share for transparency.
Installation steps
Step 1: Check for existing chargers
Start by checking if other chargers have been installed in your complex. If so, you can often reuse existing plans submitted to the city. If not, you’ll need to work with an electrician to create a new plan.
If there are already chargers there, you will have an easier time working with the same electrician. In my case, Willow Glen Electric installed two chargers at the complex previously. However, they were a pain to work with so I started from scratch with a new electrician.
Step 2: Find an Electrician
Finding a reliable electrician is crucial. I initially worked with an electrician, Emelco Electric, who installed a ceiling fan in my unit. His straightforward pricing, professionalism, and expertise made me trust him for the EV charger installation. Avoid companies with poor customer service—I had a bad experience with another company, Willow Glen Electric, who were unresponsive and unreliable.
Choose the Best Location
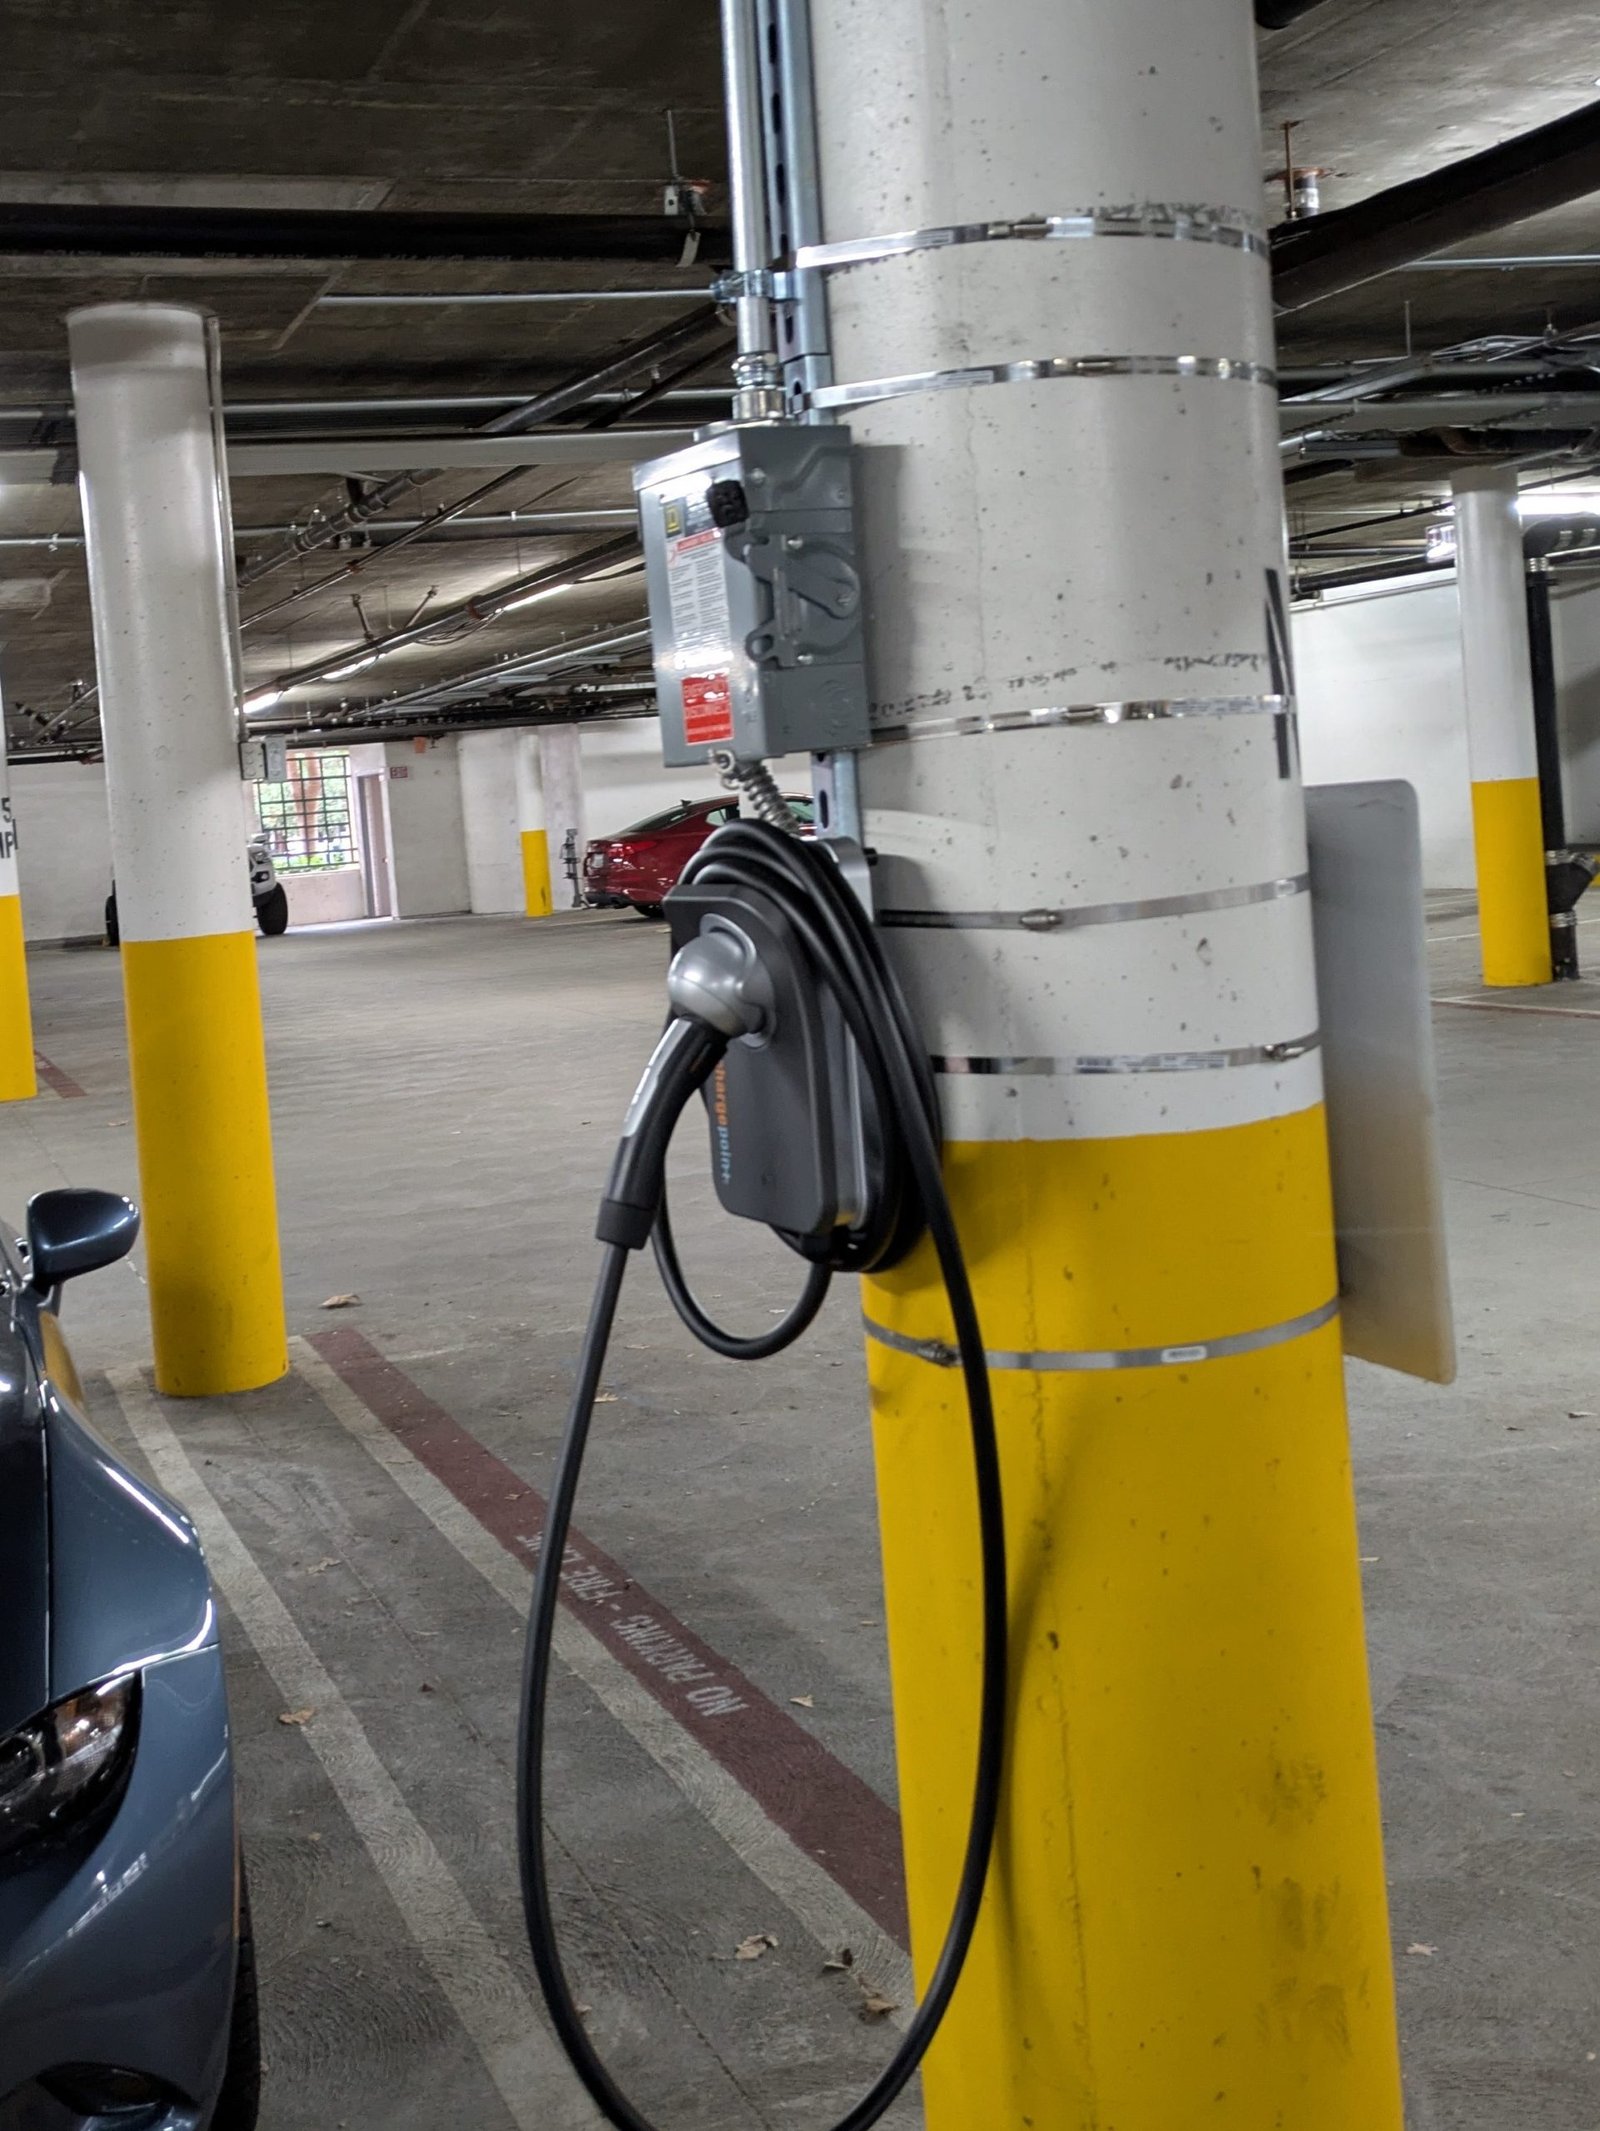
I installed my charger on a column next to my parking spot. To avoid compromising the column’s stability, we used a metal tension wrap to secure the charger. Installing it on the nearest wall is also a viable option.
Step 3: Get HOA Approval
Before starting, submit an architectural change request to your HOA. I provided a rough drawing of the installation plan, and since there were already two chargers in the complex, my request was approved quickly.
You’ll need to provide your electrician’s contractor number, so this is why you get HOA Approval *after* finding an electrician.
Step 4: Get a permit from your city
Normally your electrician should do this part, but he said that he will charge me less for the installation if I do the work of getting the permit myself.
Getting a permit was quite easy online. However, the City of San Jose had a confusing website, in which they said that multifamily chargers will get an expedited permit, but then in another part of the site it says that you need to submit full architectural plans for a charger.
I went to City Hall to iron out these details, and this process was cumbersome. They acknowledged the discrepancy on their website and said that I can just proceed with my expedited permit. However, they were about to make me submit full architectural plans, and it would have taken a lot of effort to create these plans.
Step 5: Installation Process
Now I’ll describe how the installation went. Most of the work was completed in one day, but the electrician had to come back the following morning to finish the job.
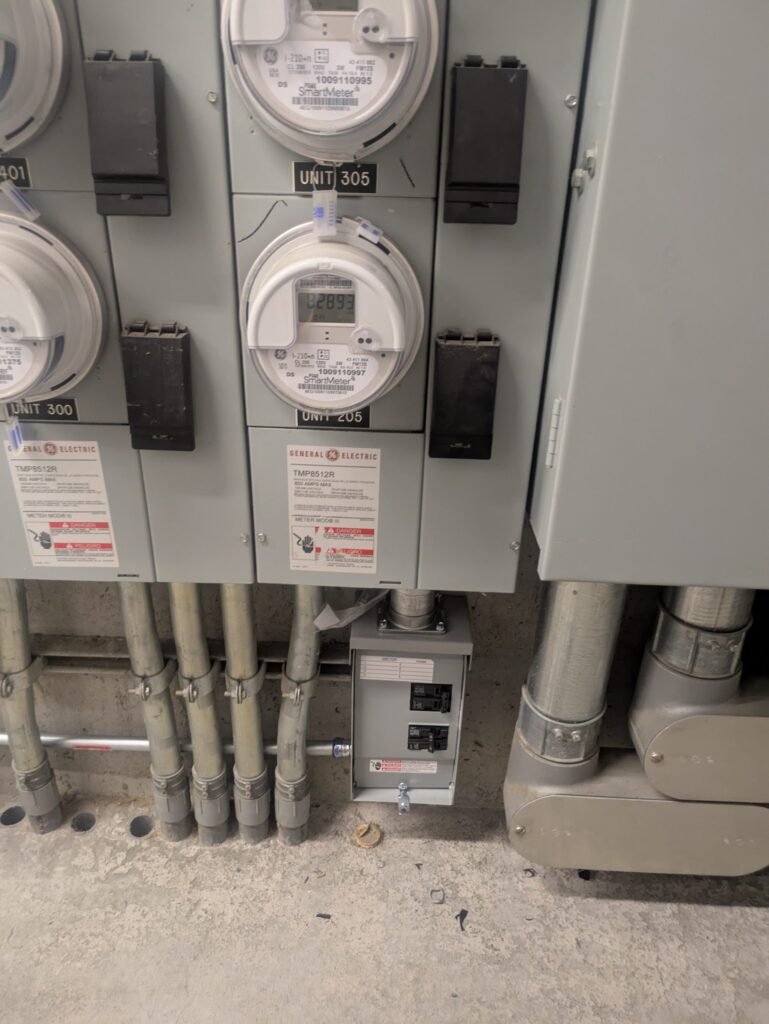
- Sub panel installation
- Iraj installed a subpanel in the electrical room. This sub panel gets power from my meter, and it has its own breaker for the EV charger. This was the most complicated part of the installation, because all the condo units’ meters are together in this room, so he had to be careful to not damage other units’ meters.
- We had to turn off the power to my unit for a couple hours while he completed the wiring.
- Conduit in wiring
- My electric meter was in the electrical room in the garage, so we installed conduit through a gap in the upper part of the wall, and this conduit goes all the way to the charger at my parking spot.
- Installing the conduit was challenging due to cars parked in the garage. We had to work around the cars which was challenging, and I wish we had asked residents to move their cars beforehand.
- Disconnect switch
- We are legally required to have a disconnect switch before the EV charger. If there is any malfunction with the charger, the disconnect switch will shut off power to the charger, without needing access to the breaker in the electrical room.
- The switch is also important because when I’m out of town I can flip the switch on and lock access to the switch. This prevents someone from trying to charge their car in my spot when I’m away.
- Note that you need to lock the switch with a padlock, otherwise someone may open the box which has dangerous, high-voltage wiring.
- Charger installation
- The charger itself was fairly straightforward to install. In our case, we used metal which wrapped around the column next to my parking spot to secure the charger. We could have drilled directly into the concrete column, but we did not want to compromise the structural integrity of the column.
- Testing the completed installation
- The electrician made sure that I plugged the new adapter into my car to make sure that everything worked. Fortunately, everything worked the first time.
- I was slightly disappointed that I could not get the full 30 amps of charging that I can get at the chargers at work. My charger goes up to 24 amps, because that’s all my electrical panel could support, but this is plenty for me.
Step 6: Post-installation Inspection
After the installation is complete, you’ll need to schedule an appointment with the city as soon as possible so they may verify that the installation was done properly. Ideally your electrician also handles this, but because I got the initial permit, I needed to schedule the inspection as well.
The inspection is included in the original permit price (I did not have to pay for this appointment). The inspector made sure that we were not putting too high of a load on the electrical panel, checked that the subpanel was installed correctly, and checked that the proper wire gauge was used for the installation.
What I wish I had known
Be prepared for potential cost increases. My initial quote for the installation (excluding the permit fees) was under $5,000, but the final cost rose to $6,000 due to unanticipated wiring needs. The distance between your parking spot and the electric meter can significantly impact costs—thicker wires are required for longer distances, increasing expenses. Don’t assume that the original quoted price will be the final price.
During the installation, make sure to let your HOA know that the installation will happen on that day. I wish I had notified my neighbors about the installation so that they could move their cars on that day. We had to work around some parked cars which was a little dangerous, but fortunately we did not damage any vehicles.
Final Thoughts
Installing an EV charger in a condominium is a manageable process with the right planning and professionals. While costs can vary, the convenience of home charging makes it a worthwhile investment for EV owners.
8 responses to “Installing an EV Charger in a Condominium in California: A Step-by-Step Guide ”
Thanks for educating me!
No problem, champ.
As usual, Juan, you have provided an EXCELLENT service to your neighbors here at MTP with this document. As President of our HOA, my thanks for your efforts. Walt
Thank you very much Walt, I’m glad you find it to be useful!
Hi Juan. Thank you for posting this information about your experience installing an EV charger for your parking space. My parking space is right in front of yours and this guide is very helpful for future reference in case I get an EV someday and want to pursue something similar.
Brian, I’m so glad it was helpful to you! Please don’t hesitate to reach out if you’d like any more info about the installation. Thanks for reading.
Wonderful article! We will be linking to this great content on our site.
Keep up the great writing.
Wonderful piece — informative, fair, and well-written. I genuinely look forward to new posts here.